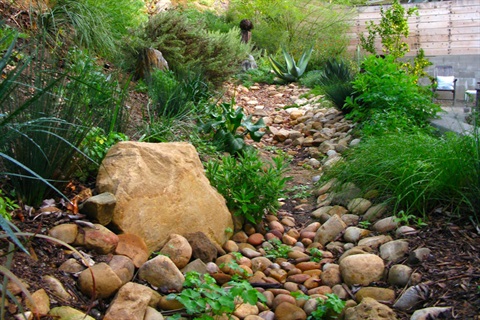
How To Build Vegetated Swales

A vegetated swale is a shallow ditch that has gently sloping sides. These side slopes should create a ditch that is visibly lower than the surrounding landscape. Native perennial grasses are planted along the bottom and sides of the swale to slow runoff, filter sediments, and remove excess nutrients. A swale relies on gravity to move water and is designed to direct the water where you want it to go, such as flower or vegetable gardens. In order for the water to gravity flow it is recommended that there be a minimum 2% slope from beginning to end. In other words, the swale should be higher in elevation on one end and then slowly get lower – visualize a very slow slide. Organic mulch should not be placed around any plants installed in the bottom or sides of the swale.
Follow these steps to build vegetated swales:
Step 1: Choose the location of your swale (s). Your swale should follow the contour of your garden and be placed in a location at the base of a slope at least 10ft from your home. Water will flow into the vegetated swale and stay there, so it is important the base of the swale is gradual sloped from the edges to the center, to allow for the swale to function properly. Place stakes along the selected location to mark the length and width of your swale.
Step 2: Check your soil to ensure that it is permeable enough to allow for water to drain through. To test for permeability, dig a hole in the desired area and pour water into it. If the water remains in the hole for more than a day then the soil is not permeable enough for a vegetated swale site and you will have to choose a different location or till the soil with a mixture of compost, plant matter and soil until the desired permeability is achieved.
Step 3: Dig your swale and build a berm. Typically, vegetated swales are Six- to 12-inches deep and 3- to 4-feet wide, however, the size of the swale will depend on individual drainage needs and landscape size. The bigger the swale is, the more water it can absorb during a heavy downpour. Place excavated soil onto the downhill side of the basin to create a berm (short wall) which will ensure the water stays in the vegetated swale. Stomp the berm firmly down to ensure the wall is sturdy and slope the berm into the surrounding garden to make it less likely to erode, as well as to incorporate the vegetated swale into the rest of your landscape.
Step 4: Plant your vegetated swale. Select native mature plants with well-developed root systems which make them more likely to survive in the case of heavy downpour.
Helpful Tips:
- Immediately after a heavy rain storm assess the vegetated swale for any damage to plants or structure.
- Water your plants regularly for the first 90 days and in times of drought to ensure their root systems grow into sturdy anchors for the vegetated swale.
- Inspect your vegetated swale regularly to ensure there are no invasive weeds or trash that may inhibit permeability of the swale. Weeds and their root systems should be removed in their entirety, especially during the first two years of vegetated swale stabilization.
Helpful Links:
https://www.ppnenvironmental.com/build-bioswale/
https://www.montgomerycountymd.gov/DEP/Resources/Files/PostersPamphlets/Rain-Garden-Bioswale-Microbio.pdf